Content
| Table of Contents | ||||||
|---|---|---|---|---|---|---|
|
1️⃣ Overview
The default configuration of Google Workspace does not allow external software to interact with the agenda of meeting rooms. The purpose of this document is to describe what has to be configured in Google Workspace so that ROOMZ can read and interact with the agenda of the roomrooms.
All these steps assume that you are logged in to Google with a super admin account.
How to check if your account is a super admin account ?
Open admin.google.com go to “Manage Users” and open your user by clicking on the name. Under “Admin roles and privileges” make sure your account is a super admin account. If your account isn’t a super admin account, you will not be able to complete all the steps necessary for the system to work, in that case please contact your administrator.
...
2️⃣ Create an application
a. Connect to the Google Admin Google APIs console available at: https://console.cloud.google.com/, using your super admin account.
Once logged click on the NewProject button. This button can be found in the Projects, on the top of the screen
...
, search in the search bar for new project and click on “Create a Project”.
...
b.Enter a name for your application, and click on the Create button“Create” button.
...
3️⃣ Create a service account
a.From the Admin Google APIs Admin home screen, open the contextual menu on the top right of the console and click on Project settings“Project Settings”.
...
b. Click on Service accounts, on the left side on “Service Accounts”.
...
c. Click on Create “Create Service account Account”.
...
d.Enter an account name, for instance roomzserviceaccount and select the role Service Account User
...
Save the service account by clicking Done. Step 2 and 3 can be ignored
...
Go back to your list of service accounts and example “Roomz Service Account”, copy the “Service Account E-Mail” to a txt file for later and click on “Create and Continue”.
...
e.Select the role “Service Account User” and click “Done”.
...
f. On the overview of your service accounts, click on the 3 dots , on the corresponding line. Choose Manage keys
...
Create the key in *.json format. When you click on the Add Key button, a file containing the credentials of the service account will be downloaded on your local machine. Make sure you know right. Select “Manage keys”.
...
g. Click on the “Add Key” button, choose “JSON format” and click on “Create” to download the key-file to your computer. Make sure you remember where you store this file because you won't be able to download it anymore. This file will be necessary to connect the ROOMZ Portal to Google Workspace.
...
h. Open the file with editor to copy and closing the dialog, you will be able to get the service account's client ID and email address.
You should now have gathered your service account's Private Key file, Client ID and email address. You are ready to delegate domain-wide authority to your service account.
save the “Client ID” in your txt file for later.
...
i. You should now have noted in a txt file the following information’s and the key-file stored on your computer.
Service Account E-Mail
Client ID
JSON key file saved on your computer
4️⃣ Delegate domain-wide authority to your service account (skip if you don't have a Google Workspace account)
To access user data on a Google Workspace domain, the service account that you created needs to be granted access by a super administrator for the domain. For more information about domain-wide delegation, see Control Google Workspace API access with domain-wide delegation.
To delegate domain-wide authority to a service account:
...
...
In the Domain wide delegation pane, select Manage Domain Wide Delegation.
...
Click Add new.
...
a.From your Google Workspace domain’s Admin console, go to
...
“Main menu” > “Security” > “API controls”.

b. In the “Domain wide delegation” panel, select “Manage Domain Wide Delegation” and click on “Add new”.
...
c. In the “Client ID” field, insert the client ID obtained from the
...
JSON file steps above.
...
In the
...
“OAuth Scopes” field, enter
...
the following list of scopes
...
. Click on “Authorize”.
| Code Block |
|---|
https://www.googleapis.com/auth/calendar, https://www.googleapis.com/auth/admin.directory.user.readonly |
...
5️⃣ Enable Google APIs
a. From the Google APIs Dashboard available at https://console.cloud.google.com click on the Library on the left menu.
...
Then on Google APIs Library screen, select the group Google Workspace on the left menu.
Remember how to proceed to this step to display only Google Workspace APIs because you will need to come back to this screen a few steps later.
...
Click on the Google Calendar API search for “Google Calendar API”:
...
b. Click on the “Google Calendar API” and enable it.
...
c. As soon as the Google “Google Calendar APIAPI” is activated, go back to the Google APIs Library and search for Google Workspace again.
...
Find the Admin SDK API in Google Workspace and search for “Admin SDK API”.
...
d. Click on the “Admin SDK API” and enableit.
...
6️⃣ Manage rooms resources (skip if you don't have a Google Workspace account)
a. Go back to Admin console and search for “Calendar”:
b. From the Google Admin console home screen, Click on Apps“Apps”.
...
Then click on Calendar
...
c. Adapt the sharing settings at least as follows, for the Primary and Secondary Calendars
...
For the secondary calendars, you might have to go to Applications - Google Workspace - Calendar - General Settings
Change the External Sharing options for secondary calendars to “Make changes”
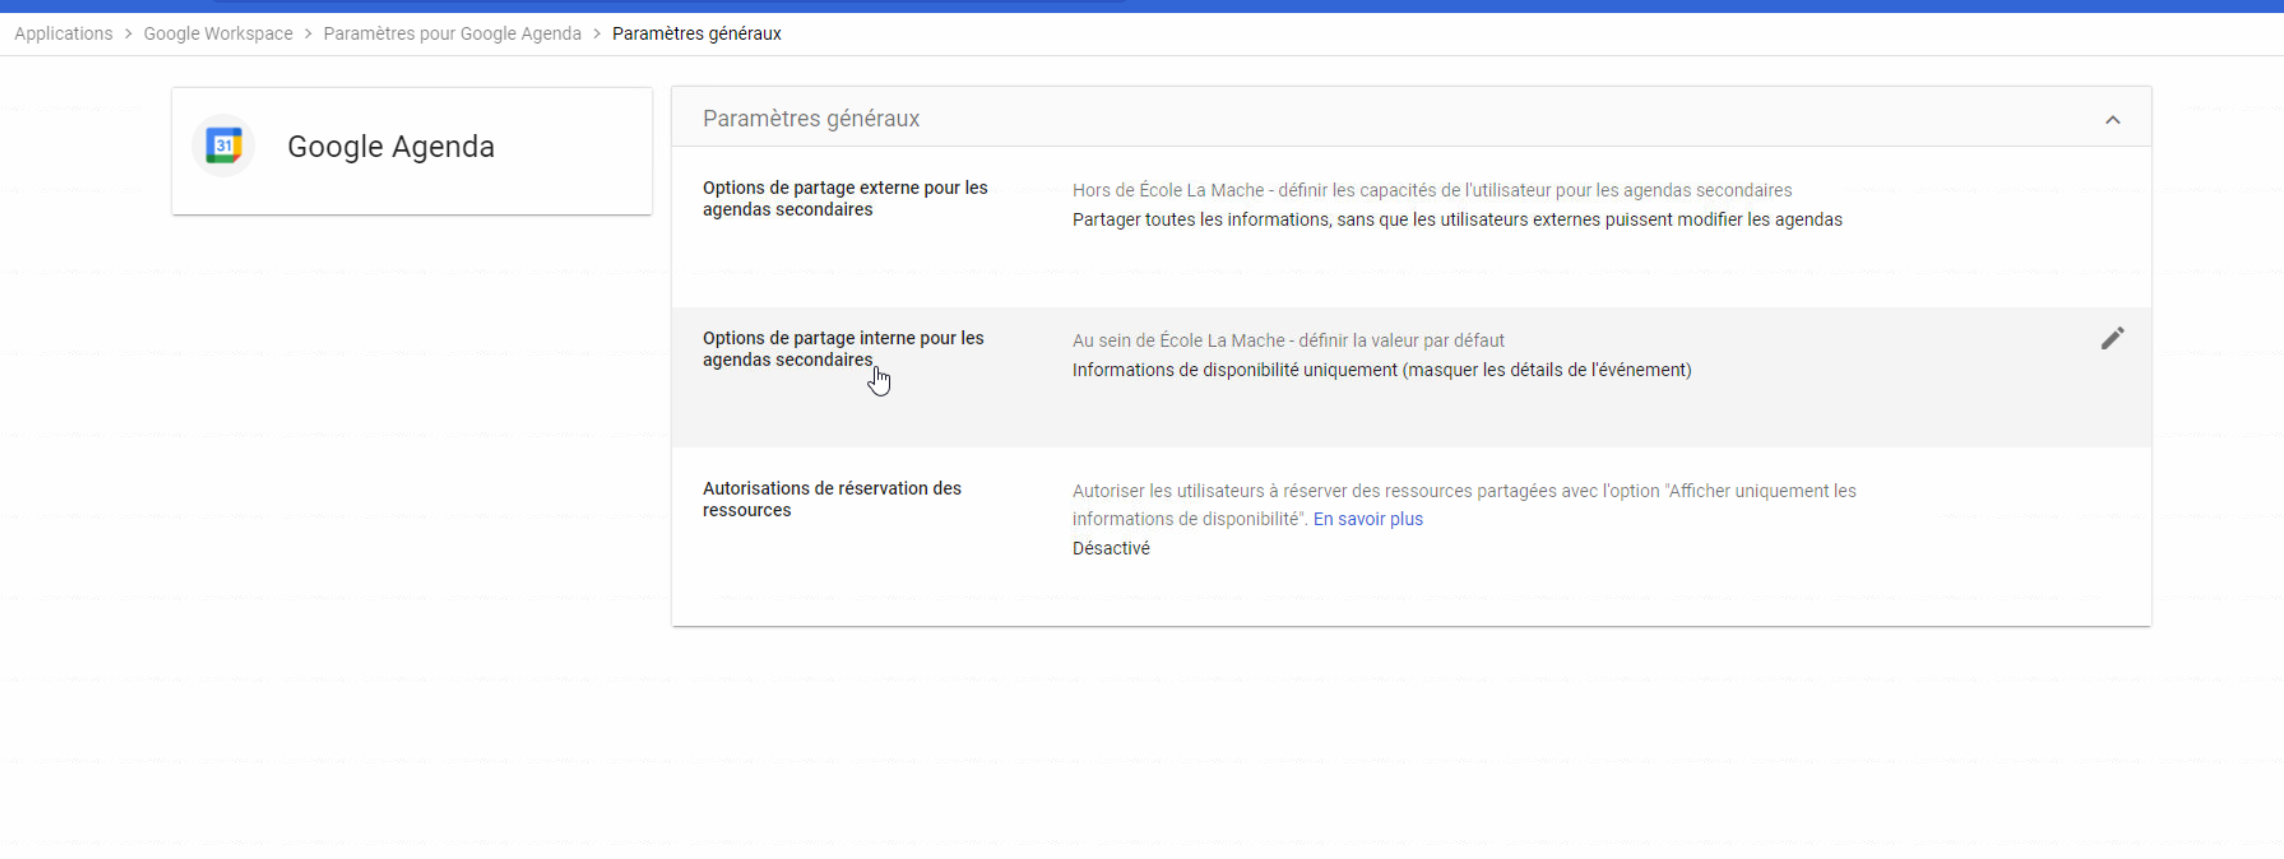
primary and secondary calendars.
...
d. In order to create a new meeting room, click on Resources“Resources”
...
e.Click on the yellow "plus" + icon and fill in the requested information information's.
...
| Tip |
|---|
Regarding the Type field, In order to create a meeting room, you need to create a building first |

f. After saving the resource, you can reopen it and identify its email address (Resource email)Copy this email address somewhere “Resource email”. Save the email address in your txt file, as you will need it at least in order to map your meeting room into the ROOMZ Server.
...
7️⃣ Share the resource(s) with the Service Account
| Note |
|---|
This step is often overlooked and forgotten, but it is necessary if you want Instant Book and Instant Release the configuration to work from the ROOMZ Displays. When the sharing with the service account is not done properly, you will get a Connection to the server failed message on the device when trying to book or release a room with the Display |
In order to share a calendar with the service account on the ROOMZ Server, you need to add the room's calendar in your calendar's list.
a.Go to your calendar “Your Calendar” by connecting to: https://calendar.google.com.
b.Search for Other Calendars“Other Calendars” on the left side of the screen, and add a new calendarclick on the + to “Browse Resources”.
...
Then choose Browse resources
...
c.Add the wished resource to your calendar : here for example, Weisshorn
...
Go back to your calendar (https://calendar.google.com)
by checking the blue box, for example “ROOMZ TEST (1)”.
...
d. Click on the room's name on the left of the screen and open Settings and sharing
...
Scroll down to Share open “Share with specific people or groups”.
...
e. Click on “Add people and groups”, you will arrive on at this page:
...
f. Share the room with the email with the email address of the service account you created (and wrote down) a few minutes agoaccount from your txt file. Make sure to select Make select “Make changes to eventsevents”.
...
g. Repeat these steps for each resource
Yeah! Google is configured! ![]()
8️⃣ Next steps
You can then continue the setup in the ROOMZ Portal: Booking System and Resources connection