Content
General
If you wish to create your Desk without a plan, click Add spaces. We recommend creating the spaces with the plan editor, the different types of desk you find below.
You can now choose a Desk :

Once the desk is created, click on it
A desk could be a bookable desk, a Hot desk or an allocated desk. If you would like to have a Hot desk, you need to connect a desk sensor to the space, detailed information you find here
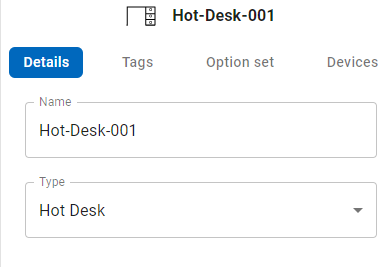
Hot Desk
Settings for a Hot desk (non-bookable desk, anybody is able to use it, just sit down, the sensor is switching the status to red):
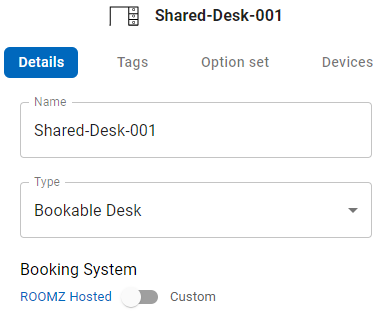
Bookable Desk
Settings for a bookable desk (bookable via https://my.roomz.io/ ):
Allocated Desk
Settings for an allocated desk (Fix desk used by a single person or a function (Tag)), you can select the day’s of allocation. The desk will be a bookable desk on the days that are not selected:

Here you can set global if the desk is just not bookable, you could link it with a Tag (for ex. cleaning or broken). If you wish to connect the desk to a specific user, this user should be registered in the system (Login via www.my.ROOMZ.io):

In the setting above, the Desk is allocated for the user ROOMZ Manager on Monday, Tuesday and Wednesday, the other days the desk is bookable via myROOMZ
Bookable Desk in an area
If you would like to provide the user a desk in an area, you just have to create the space desk in the list:

As desk type you could use all other types above, most of the time we recommand to select bookable Desk:

Do not forget to click on save if you change the settings
Further information
If you want to add some zones or tags to the space, please see here.
If you would like to change the option set, you find more information under the following page